

How do you detail a car? You detail a car by cleaning, decontaminating, restoring, and protecting both the interior and exterior in the correct order. A proper car detail usually includes wheels and tires, pre-wash, contact wash, paint decontamination, drying, polishing if needed, protection, interior vacuuming, surface cleaning, stain treatment, glass cleaning, and finishing touches.
Car detailing is more thorough than a standard car wash. A car wash removes surface dirt. Car detailing goes further. It focuses on the condition of the paint, trim, glass, wheels, carpets, upholstery, leather, and protective layers. The goal is not just to make the vehicle look clean for a day. It is to restore appearance, preserve materials, and make future maintenance easier.
What is car detailing?
Car detailing is the deep cleaning, restoration, and protection of a vehicle’s interior and exterior using specialized tools, methods, and products. It goes beyond a routine wash by targeting bonded contamination, minor defects, interior buildup, stains, odors, dull trim, and loss of protection.
A full car detail may include:
- washing and decontaminating paint
- cleaning wheels, tires, and wheel wells
- polishing paint to improve gloss
- protecting surfaces with wax, sealant, or ceramic coating
- vacuuming and deep-cleaning interior materials
- conditioning leather and dressing trim
- cleaning glass inside and out
Car detailing vs car wash: what is the difference?
A standard car wash is designed for speed. It removes loose dirt, road film, and basic grime.
Car detailing is designed for results. It focuses on:
- surface-specific cleaning
- deeper contamination removal
- better drying and finishing
- material preservation
- appearance improvement
- longer-lasting protection
If a car wash is basic hygiene, detailing is full surface care.
Why detailing a car matters
Detailing is not only about appearance. It also helps:
- preserve paint and interior materials
- reduce long-term wear
- improve resale presentation
- make routine cleaning easier
- spot issues early, such as stains, scratches, fading, or contamination buildup
What you need before you start
You do not need a professional studio to do a good detail, but you do need the right tools and a safe process.
Basic exterior detailing tools
- pH-balanced car shampoo
- two buckets with grit guards
- microfiber wash mitt
- wheel cleaner
- wheel brushes and tire brush
- pre-wash or foam product
- clay bar or clay mitt
- iron remover
- tar remover if needed
- drying towel or air blower
- paint-safe microfiber towels
- wax, sealant, or ceramic spray
Basic interior detailing tools
- vacuum with crevice attachments
- microfiber towels
- soft detailing brushes
- interior cleaner
- carpet and upholstery cleaner
- glass cleaner
- leather cleaner and conditioner if applicable
- odor eliminator if needed
Optional but useful
- pressure washer
- foam cannon
- dual-action polisher
- pad set and polish
- extractor or steam cleaner
- trim protectant
- tire dressing
Before you detail a car: key setup rules
Before you touch the paint or interior surfaces:
- work in the shade if possible
- avoid cleaning hot surfaces
- test unfamiliar products on a small area first
- use clean towels and brushes
- keep wheel tools separate from paint tools
- read product instructions before use
This matters because good detailing is not just about effort. It is about reducing the chance of scratching, staining, or leaving residue behind.
Step-by-step: how to detail a car properly
Step 1: Start with wheels and tires
Always clean the wheels and tires first. They are usually the dirtiest part of the vehicle and can splash grime onto already-clean paint if you leave them until later.
What to do
- rinse wheels and tires thoroughly
- spray wheel cleaner
- agitate barrels, faces, lug areas, and tires with dedicated brushes
- rinse completely
Why this step comes first
Brake dust and road grime are abrasive. If you clean these areas later, you risk throwing contamination back onto the paint.
Step 2: Pre-rinse and pre-wash
A good pre-wash reduces the dirt load before any contact wash begins.
What to do
- rinse the vehicle to remove loose debris
- apply a pre-wash or snow foam
- allow it to dwell without drying
- rinse thoroughly
Why it matters
This step helps loosen traffic film, dust, and grime so you drag less dirt across the paint during the hand wash stage.
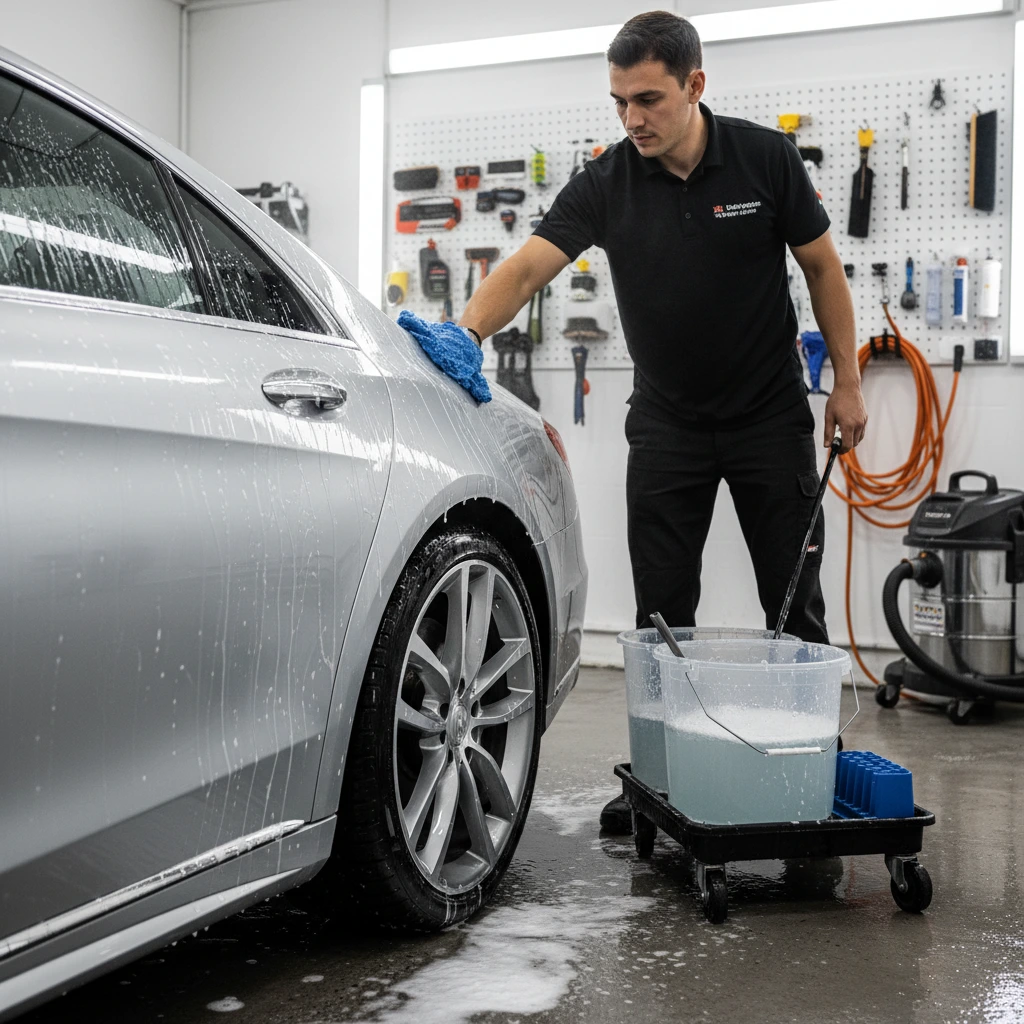
Step 3: Use the two-bucket contact wash method
This is one of the most important parts of safe auto detail car work.
What to do
- fill one bucket with wash solution
- fill one bucket with clean rinse water
- wash from top to bottom
- rinse the mitt often
- leave lower, dirtier panels for last
Why it matters
The two-bucket method helps reduce swirl marks by keeping more dirt out of your wash media.
Step 4: Decontaminate the paint
Even after washing, paint can still feel rough because bonded contaminants remain.
Typical decontamination steps
- use iron remover for embedded fallout
- use tar remover where needed
- use clay bar or clay mitt with proper lubrication
Why it matters
Decontamination removes contamination that washing cannot. It creates a smoother surface and prepares the paint for polishing or protection.
Step 5: Dry the car properly
Drying is not a throwaway step. It can make or break the finish.
Best practice
- use a clean microfiber drying towel or filtered air
- blot or glide lightly rather than scrubbing hard
- address trapped water around mirrors, badges, trims, and panel gaps
Why it matters
Poor drying can create water spots and towel marks, especially on soft paint.
Step 6: Inspect the paint
Now that the surface is clean, inspect the finish in good light.
Look for:
- swirl marks
- oxidation
- water spots
- minor scratches
- haze
- leftover contamination
This step tells you whether the paint only needs protection or whether it also needs correction.
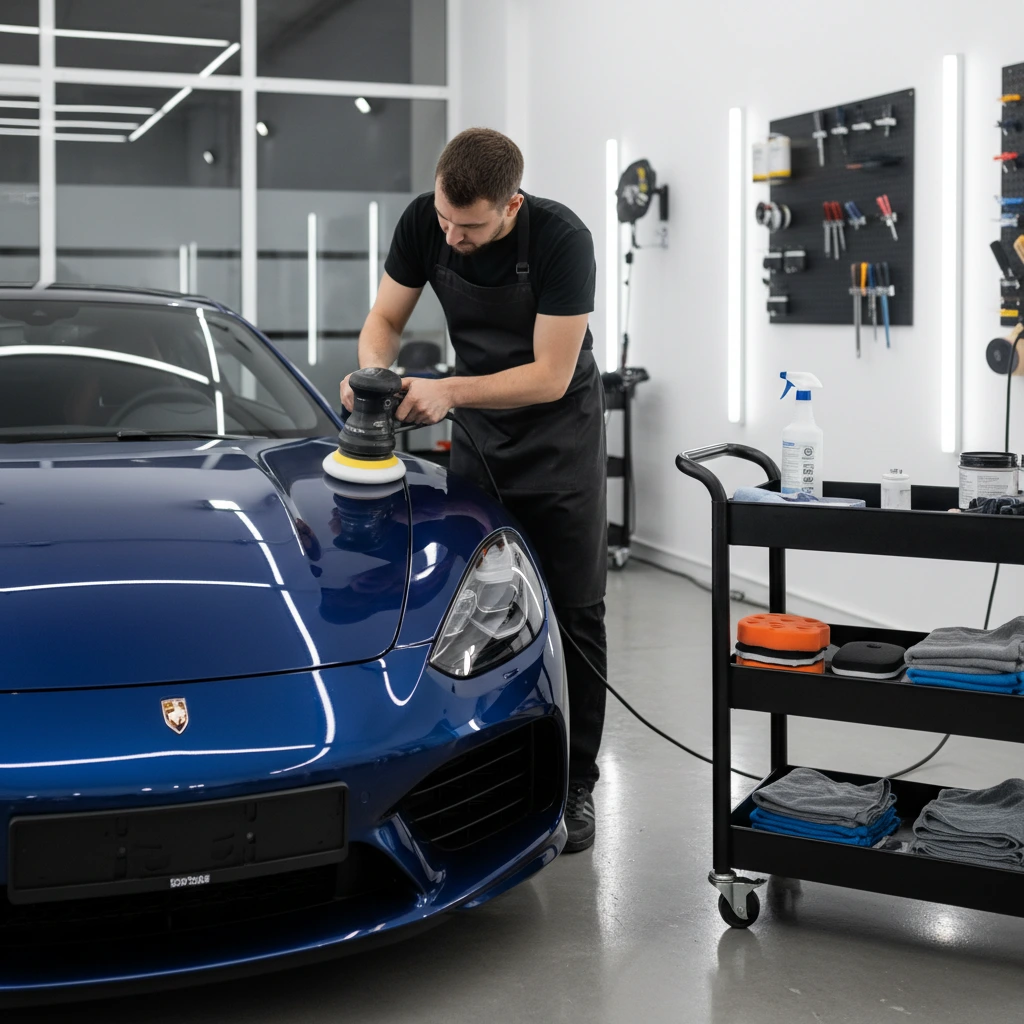
Step 7: Polish if needed
Polishing is optional, but it is often what separates a clean car from a properly detailed car.
Polish when:
- the paint has swirl marks
- gloss looks dull
- there are light defects you want to improve
Do not polish when:
- the paint is already in good shape
- you do not have the skill or tools
- you are not comfortable measuring risk on thin or damaged paint
Important note
Polishing corrects or improves defects. Wax and sealants do not.
Step 8: Protect the paint
Once the paint is clean and corrected if needed, apply protection.
Common protection choices
- wax for warm glow and short-term protection
- paint sealant for longer-lasting protection
- ceramic coating or ceramic spray for better durability and easier maintenance
Which one should you choose?
- choose wax if you want simple gloss and low cost
- choose sealant if you want more durability
- choose ceramic-based protection if you want longer-lasting water behavior and easier upkeep
Step 9: Dress tires and exterior trim
This is the finishing stage that often makes the vehicle look complete.
What to do
- apply tire dressing evenly
- restore faded plastic trim only with trim-safe products
- avoid sling by allowing dressings to settle before driving
Why it matters
Fresh tires and tidy trim make the entire detail look more polished.
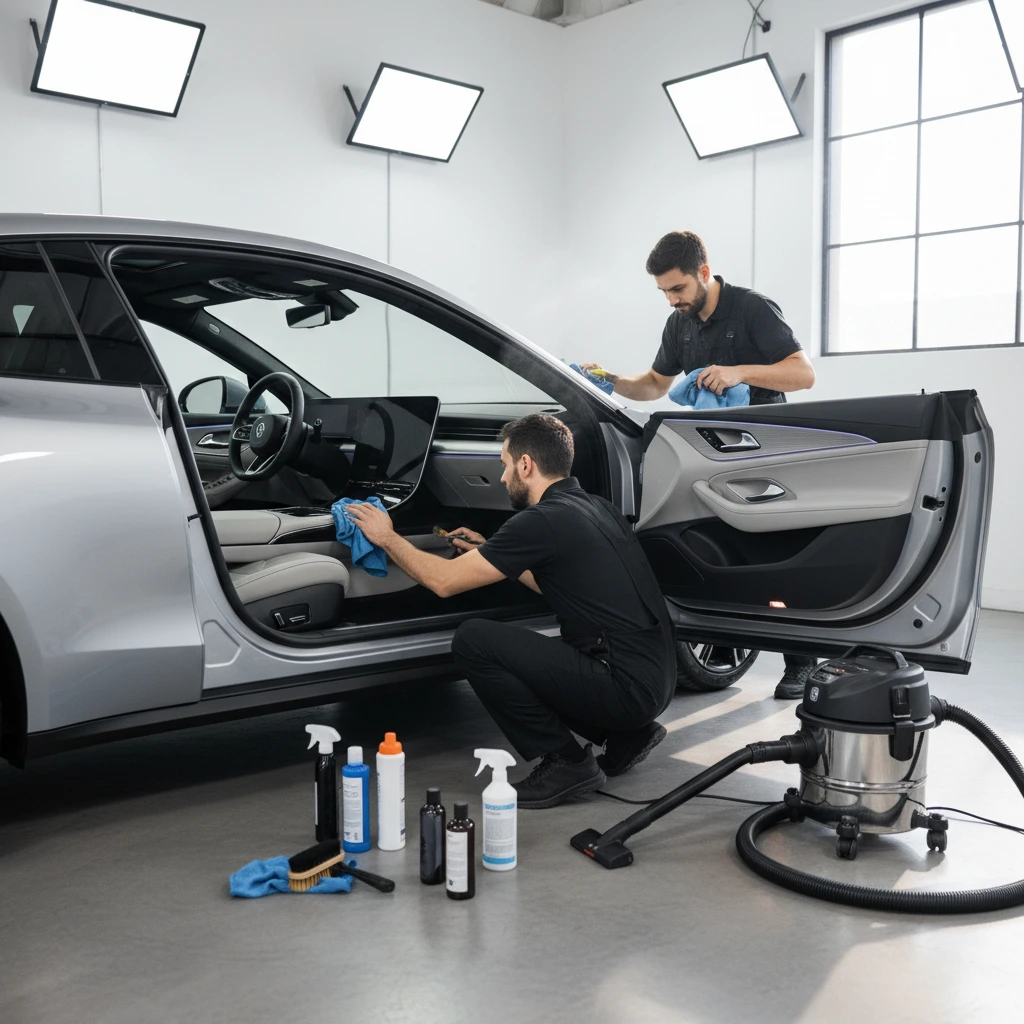
How to detail a car interior
Step 10: Remove clutter and vacuum thoroughly
Take out floor mats, loose trash, and personal items first.
Then vacuum:
- carpets
- floor mats
- seat rails
- under seats
- between cushions
- storage compartments
- trunk or cargo area
A strong vacuum stage sets up every other interior step.
Step 11: Clean hard interior surfaces
Use an interior-safe cleaner on:
- dashboard
- center console
- steering wheel
- door panels
- cup holders
- vents
- buttons and trim pieces
Use soft brushes for tight areas and wipe residue away with a clean microfiber towel.
Step 12: Clean fabric, carpet, upholstery, and leather properly
Not every interior uses the same materials, so do not use one product for everything unless it is genuinely surface-safe.
For fabric and carpet
- pre-treat stains
- use a fabric-safe cleaner
- agitate gently if needed
- blot or extract instead of over-soaking
For leather
- use a leather-safe cleaner
- wipe gently
- follow with conditioner if appropriate
For vinyl or coated surfaces
- use a compatible interior cleaner
- avoid greasy residue on high-touch areas
Step 13: Deodorize the cabin if needed
If the interior still smells bad after cleaning, surface cleaning alone may not be enough.
Common odor sources:
- food spills
- pet hair
- moisture
- smoke
- dirty carpets
- clogged cabin filters
If needed, use:
- fabric-safe odor eliminators
- air vent treatment
- deeper extraction
- cabin air filter replacement
Deodorizing works best after the source is cleaned, not before.
Step 14: Clean the glass last
Do interior and exterior glass last so you do not re-contaminate it during the rest of the detail.
Best glass-cleaning tips
- use a dedicated glass cleaner
- use separate glass towels
- wipe in one direction on the inside and another on the outside
- lower windows slightly to clean the top edges
This simple technique makes it easier to see which side still has streaks.
Step 15: Final inspection and touch-ups
Walk around the vehicle and check:
- missed residue
- streaks on glass
- dirty jambs
- leftover tire sling
- smudges on screens or trim
- trapped water in mirrors and crevices
A proper car detail ends with inspection, not just with the last spray bottle.

Common mistakes people make when detailing a car
Washing in direct sunlight
This can cause soap and cleaners to dry too fast and leave spots or streaks.
Using household cleaners
Many household products are too harsh for automotive surfaces.
Using one towel for everything
This spreads grime and increases the risk of scratching sensitive surfaces.
Skipping decontamination
Paint can still feel dirty even after washing.
Polishing unnecessarily
Not every car needs polish every time.
Dressing the steering wheel or pedals
This can create a dangerous slippery surface.
Over-wetting interior materials
Too much liquid can lead to odor, residue, or mildew issues.
How often should you detail a car?
A practical general schedule looks like this:
Quick maintenance
- weekly or biweekly wash
- light interior vacuum and wipe-down
More thorough detail
- every 2 to 4 months for many drivers
Deep seasonal detail
- at least twice a year
- more often for harsh climates, pets, kids, or high-mileage vehicles
The right frequency depends on where you drive, where you park, and how much contamination the vehicle sees.
Is DIY car detailing worth it?
For many people, yes.
DIY detailing pros
- lower cost over time
- more control over products and process
- satisfying results
- easier to maintain a protected vehicle
DIY detailing cons
- time-consuming
- tool and product learning curve
- higher risk of mistakes
- polishing and advanced correction require skill
If you only want basic maintenance and have the time, DIY can be excellent. If your paint needs correction, your interior is heavily stained, or you want high-end finishing, professional car detailing services may be the better option.
When to book professional car detailing services
DIY is not always the smartest choice.
Consider car detailing services when:
- the paint has heavy swirls or oxidation
- the interior has deep stains or odor issues
- you want paint correction
- you want ceramic coating applied correctly
- you are short on time
- the vehicle has been neglected for a long time
FAQ: how to detail a car
What order should I detail my car in?
Start with wheels and tires, then pre-wash, contact wash, decontamination, drying, polish if needed, paint protection, and finally the interior and glass.
Should I wax or seal a car after detailing?
Yes, if the paint is clean and ready. Protection helps preserve the finish and makes future washing easier.
Can I detail a car without a machine polisher?
Yes. You can do a very good detail without machine polishing. Polishing is optional and should only be done when needed.
How long does it take to detail a car?
A basic detail may take 2 to 4 hours. A full detail with decontamination, interior work, and polishing can take much longer depending on the vehicle’s size and condition.
How often should I detail my car interior?
A light interior detail can be done monthly, while a deeper interior clean is often helpful every few months, especially if the car sees heavy daily use.
Is car detailing safe for new cars?
Yes, as long as proper products and techniques are used. New cars can still benefit from safe washing, decontamination, interior cleaning, and paint protection.
What is the best protection after detailing?
It depends on your goals. Wax offers short-term shine, sealants offer more durability, and ceramic-based protection usually lasts longer and makes maintenance easier.
Final takeaway
If you want to know how to detail a car, the answer is not just “wash it better.” Proper car detailing is a structured process that cleans, restores, and protects the vehicle inside and out. When done correctly, it improves appearance, preserves materials, and makes ongoing maintenance easier. For light upkeep, DIY works well. For heavier correction or deep restoration, professional car detailing services can save time and deliver better results.