


How do you wash a car? (Quick Answer)
Park it on a cool surface in the shade, rinse away loose grit, clean the wheels with separate tools, wash the body from top to bottom with automotive shampoo and a clean microfibre mitt, rinse thoroughly, and dry immediately with a soft microfibre towel. During Canadian winters, include the wheel wells and undercarriage to remove road salt and slush.
The washing process is simple, but technique matters. A dirty sponge, unsuitable cleaner or rushed drying method can leave swirl marks, water spots and residue even when the vehicle appears clean.
This guide explains the safest practical method for washing most cars at home while also covering winter conditions, pressure washers, automatic washes and professionally maintained finishes.
What Does Washing a Car Properly Involve?
A proper car wash removes loose and bonded contamination without grinding it into the clear coat.
The five basic stages are:
- Pre-rinse loose dirt, grit and salt.
- Clean the wheels with separate equipment.
- Contact-wash the body using lubricated automotive shampoo.
- Rinse away all residue.
- Dry the vehicle safely before water spots form.
Wax, spray sealant and tire dressing are optional finishing steps. They are not required every time you wash.
What Do You Need to Wash a Car?
You do not need a large collection of detailing products. Start with the essentials and add specialist tools only when they solve a real problem.
Essential supplies
| Item | Purpose |
|---|---|
| Automotive car shampoo | Loosens dirt while providing lubrication |
| Two buckets | Separates wash solution from dirty rinse water |
| Microfibre wash mitt | Lifts contamination with less friction |
| Separate wheel mitt or brush | Prevents brake dust from reaching the paint |
| Hose with trigger nozzle | Pre-rinses and rinses the vehicle |
| Microfibre drying towel | Absorbs water without aggressive rubbing |
Helpful optional supplies
- Grit guards for the buckets
- A soft wheel-face brush
- A narrow wheel-barrel brush
- Bug or tar remover
- Foam cannon or pump sprayer
- Pressure washer
- Drying aid or spray sealant
- Filtered or deionised rinse water
- Soft detailing brushes for badges and grilles
A foam cannon can improve coverage and loosen grime, but it is not necessary for a safe maintenance wash. Good pre-rinsing, clean tools and careful contact washing matter more.
Before You Start
Park in the shade
Wash the car when its panels are cool. Direct sunlight and hot bodywork cause water and shampoo to dry too quickly, increasing the likelihood of water spots and soap residue.
Early morning, late afternoon, an indoor bay or a shaded area usually works best.
Close the windows and check the vehicle
Confirm that:
- All windows and the sunroof are fully closed.
- The fuel or charging door is secure.
- Wipers, trim and exterior accessories are not loose.
- There are no major paint chips or lifting wrap edges.
- The wheels and brakes have cooled after driving.
Check local runoff rules
Do not assume that driveway washing rules are identical across Canada. Municipal stormwater requirements vary.
In Ottawa, soap, oil and other driveway contaminants can enter storm sewers and travel untreated into local waterways. The City recommends washing vehicles at facilities that manage wastewater or using a location where runoff can filter into the soil rather than enter a storm drain.
How Do You Wash a Car Step by Step?
Step 1: Remove Loose Items and Inspect the Paint
Walk around the car before introducing water.
Look for:
- Bird droppings
- Tree sap
- Bug residue
- Road tar
- Heavy mud
- Loose trim
- Paint chips
- Damaged protective film
Do not scrape dried contamination. Soften it during the prewash and use a product specifically designed for the substance when necessary.
A quick inspection also helps you identify new chips, scratches, fluid leaks or damaged tires while the vehicle is clean enough to examine.
Step 2: Clean the Wheels and Tires With Separate Tools
Wheels usually carry the most concentrated contamination, including brake dust, road film and grit.
Clean them before washing the body so any splashed residue can be removed during the main wash.
- Rinse one wheel and its wheel well.
- Apply a wheel cleaner confirmed as safe for that wheel finish.
- Agitate the tire, wheel face and accessible barrel with separate brushes.
- Rinse thoroughly.
- Repeat on the remaining wheels.
Do not use the wheel brush, mitt, towel or bucket on painted body panels. Metallic brake particles and grit can scratch the clear coat.
Avoid allowing wheel cleaner to dry. Also avoid applying slippery tire products to the tread or brake components.
Step 3: Pre-Rinse the Car Thoroughly
Rinse the vehicle from the roof downward.
Pay particular attention to:
- Rocker panels
- Lower doors
- Front bumper
- Rear bumper
- Wheel arches
- Mirror housings
- Grille openings
- Door-handle recesses
- Areas behind mud flaps
The purpose of the pre-rinse is to carry away material that could otherwise become abrasive during contact washing.
A pressure washer can help, but use it cautiously. Select a broad fan pattern, keep the nozzle moving and maintain a sensible distance. Do not concentrate high-pressure water on chipped paint, seals, sensors, cameras, emblems, convertible-top edges or lifting protective film. Follow the pressure-washer and vehicle manufacturers’ instructions.
Step 4: Pre-Treat Bugs, Salt and Heavy Grime
Apply an appropriate prewash or spot treatment only where needed.
For bug residue
Soften the area first. Use a bug-removal product or a shampoo-soaked microfibre towel placed gently over the spot. Do not scrub dried insects aggressively.
For bird droppings
Remove them promptly because they can affect the finish. Saturate the material, allow it to soften and lift it gently rather than scraping.
For road salt and winter grime
Give extra attention to the lower doors, rocker panels, wheel wells and undercarriage. CAA North & East Ontario recommends regular winter washing, undercarriage cleaning and avoiding very hot water or harsh brushes when removing salt and grime.
Do not begin contact washing until most loose winter contamination has been flushed away.
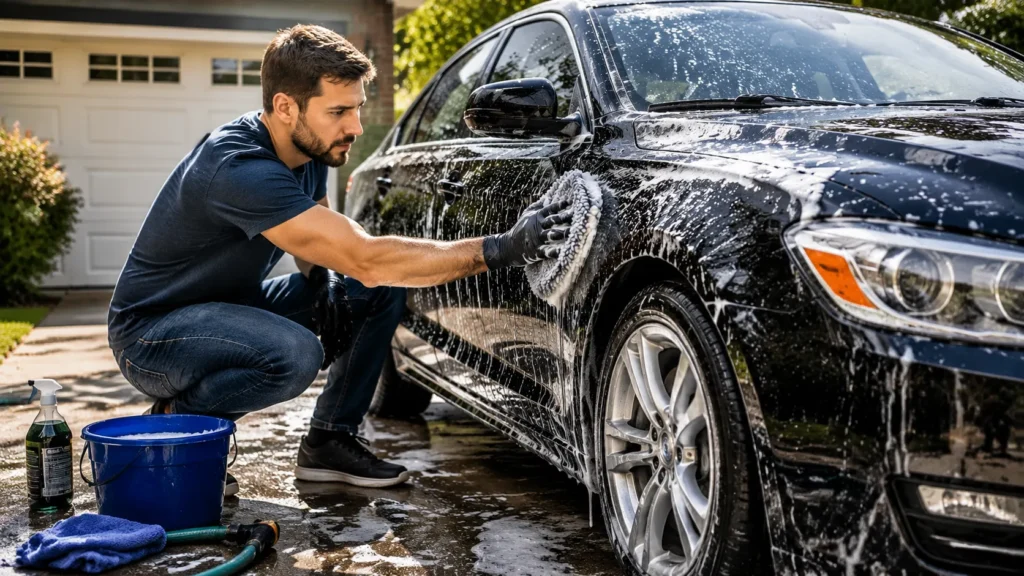
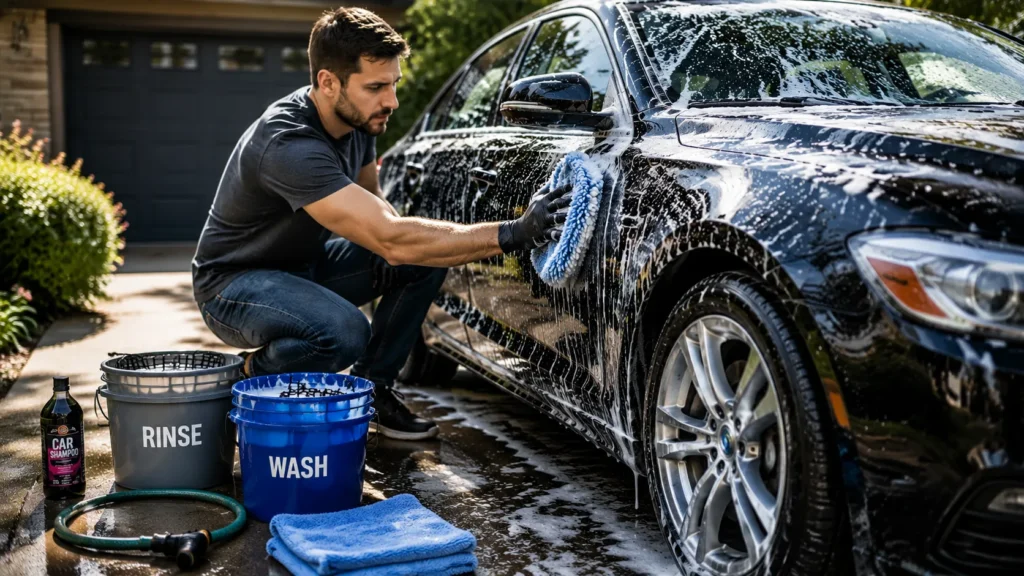
Step 5: Prepare the Two-Bucket Wash
Fill one bucket with clean water and automotive shampoo according to the product directions. Fill the second bucket with plain rinse water.
The workflow is:
- Load the mitt with shampoo.
- Wash a small section.
- Rinse the dirty mitt in the plain-water bucket.
- Reload it with clean shampoo.
- Continue to the next section.
This reduces the amount of dirt returned to the paint.
For a heavily contaminated vehicle, consider using several clean mitts instead of repeatedly returning one mitt to the wash solution.
Step 6: Wash From the Top Down
Begin with the cleanest upper surfaces and finish with the dirtiest lower panels.
A practical order is:
- Roof
- Glass
- Hood and trunk
- Upper doors and fenders
- Front and rear panels
- Lower doors and rocker panels
Use light pressure. Let the shampoo and mitt do the work.
Move the mitt in straight, overlapping passes rather than aggressive circular scrubbing. Rinse it frequently and replace it immediately if it falls on the ground.
Work in manageable sections so the shampoo does not dry. On warm days, rinse each completed area before moving on.
Why straight passes are preferred
A grain of dirt can create a scratch regardless of the direction in which the mitt moves. Straight passes do not make the surface scratch-proof, but they generally produce less visually concentrated marking than repeated circular scrubbing.
The more important controls are:
- Thorough pre-rinsing
- Adequate shampoo lubrication
- Clean wash media
- Light hand pressure
- Frequent rinsing
Step 7: Rinse the Vehicle Completely
Rinse from the roof downward until no visible shampoo remains.
Check areas that commonly retain residue:
- Side mirrors
- Door handles
- Grilles
- Roof rails
- Window seals
- Badges
- Fuel door
- Trunk seams
- License-plate recesses
For the final rinse, remove the spray nozzle or use a gentle stream where practical. Water can sheet off protected paint, leaving less water to dry manually.
Step 8: Rinse the Undercarriage in Winter
Canadian vehicles can collect road salt and slush underneath the body, around suspension components and inside wheel arches.
Environment and Climate Change Canada confirms that road salts remain widely used as part of winter road-safety management.
During winter and early spring:
- Rinse behind each wheel.
- Flush the wheel wells.
- Rinse accessible lower-body seams.
- Use an undercarriage option at a commercial wash.
- Avoid directing extreme pressure at exposed wiring, damaged coatings or seals.
A surface-only wash may improve appearance while leaving the most significant winter contamination underneath.
Step 9: Dry the Car Immediately
Do not rely on air-drying or driving around the block.
Minerals left behind as water evaporates can create visible spots, particularly in hard-water areas.
Use a clean, absorbent microfibre drying towel. Lay or drag it gently across the panel with minimal pressure. Wring it out or switch towels as it becomes saturated.
Dry in this order:
- Glass
- Roof
- Hood and trunk
- Upper sides
- Lower panels
- Door jambs
- Wheels
Use separate towels for paint, wheels and door jambs.
A vehicle-safe blower can remove trapped water from mirrors, grilles and badges, but avoid using equipment that may blow dust or debris onto the paint.
Step 10: Apply Protection if Needed
Protection is optional after an ordinary maintenance wash, but it may make future cleaning easier.
Options include:
- Spray wax
- Paint sealant
- Ceramic-compatible drying aid
- Traditional wax
- Manufacturer-approved coating topper
Follow the product instructions. More product does not necessarily create better protection.
Do not apply gloss-enhancing waxes or polishes to matte or satin finishes unless the vehicle or finish manufacturer specifically approves them.
What Should You Never Use to Wash a Car?
Avoid the following:
- Dishwashing liquid
- Household multipurpose cleaner
- Abrasive kitchen sponges
- Bath towels
- A brush previously used on wheels
- A dropped wash mitt that has not been thoroughly cleaned
- Strong solvent without checking surface compatibility
- Very hot water on frozen glass or cold panels
- Aggressive pressure on damaged paint or trim
- Dry wiping on a dusty vehicle
Household detergent may remove or weaken existing waxes and sealants. Automotive shampoo is formulated for vehicle finishes and normally provides better lubrication during washing.
Can You Wash a Car With a Pressure Washer?
Yes, provided the machine is used carefully.
A pressure washer is useful for removing loose mud, road film and debris from wheel wells. It does not eliminate the need for a contact wash when bonded dirt remains.
Use these precautions:
- Follow the equipment manufacturer’s settings.
- Choose a wide spray pattern.
- Begin farther away and move closer only when necessary.
- Keep the nozzle moving.
- Avoid directing water upward beneath seals.
- Do not spray closely at paint chips, cameras or parking sensors.
- Use lower pressure around wraps, PPF edges and convertible tops.
- Never use a concentrated zero-degree nozzle on the vehicle.
The safest setting depends on the equipment, nozzle, distance and condition of the vehicle, so a universal pressure number is less useful than controlled technique.
Hand Wash, Automatic Wash or Professional Service?
| Method | Main advantages | Main limitations | Best suited to |
|---|---|---|---|
| Hand wash at home | High control, careful tool separation, low recurring cost | Requires time, space and compliant runoff management | Drivers who enjoy vehicle care |
| Touchless automatic wash | Fast, no rotating brushes, useful in winter | May leave bonded film and can use stronger chemistry | Routine salt and dirt removal |
| Brush automatic wash | Convenient and widely available | Shared brushes may retain contamination | Drivers prioritising speed |
| Self-service wash bay | Pressure rinse and undercarriage access | Technique depends on the user; shared brushes require caution | Winter rinsing and heavy mud |
| Professional hand wash | Skilled labour and suitable equipment | Higher cost; quality varies by operator | Busy owners and delicate finishes |
| Rinseless wash | Uses little water and works in garages | Best for light or moderate dirt, not heavy mud | Condos, winter and water restrictions |
When freezing conditions, runoff restrictions, a lack of equipment or limited time make driveway washing impractical, a professional Car wash Orleans service may be the more suitable option.
Before choosing a provider, ask:
- Are wheel tools kept separate from body tools?
- Are towels changed between vehicles?
- Is the wash touchless or brush-based?
- Does the service include the undercarriage?
- Are products suitable for wraps, coatings or matte paint?
- How is wastewater managed?
- Are tire-shine products kept away from tread and brakes?
How to Wash a Car in a Canadian Winter
Winter washing is less about achieving a perfect shine and more about removing corrosive contamination safely.
Choose an appropriate location
Do not wash outdoors when runoff may freeze on the driveway, road or walking surface. Use a heated wash bay, indoor facility or touchless wash during severe cold.
Prioritise lower areas
Focus on:
- Wheel wells
- Undercarriage
- Rocker panels
- Lower doors
- Rear bumper
- Trunk and hatch seams
Dry seals and openings
After the wash, dry door seals, handles and fuel-door edges. Open and close doors before leaving the facility when conditions permit so residual water is less likely to freeze them shut.
Avoid sudden temperature changes
Do not pour very hot water over frozen glass or cold exterior surfaces. A rapid temperature difference may stress glass and other materials.
Washing Special Vehicle Finishes
Ceramic-Coated Cars
Use a pH-appropriate shampoo recommended for the coating. Avoid products that leave heavy waxes or fillers unless the coating manufacturer approves them.
A coating makes cleaning easier but does not make the vehicle immune to scratches. Dirty mitts and poor drying can still mark the surface.
Paint Protection Film
Inspect the film for lifting edges before washing. Avoid directing high pressure into seams or edges. Do not aggressively scrub bugs or tar.
Follow the installer’s curing instructions after new film installation.
Vinyl-Wrapped Cars
Use wrap-compatible products and moderate water pressure. Avoid harsh solvents, excessive heat and pressure directed into seams.
Matte wraps require products that do not add unwanted gloss.
Matte or Satin Paint
Do not polish matte paint with conventional abrasive polish. Avoid ordinary waxes that may create uneven shine.
Use cleaners and protectants specifically approved for matte surfaces.
Convertibles
Use gentle water flow around roof seals. Do not use a strong jet on fabric or vinyl tops. Clean and protect the roof with material-specific products.
Electric and Hybrid Vehicles
An electric vehicle can be washed normally. Its external electrical systems are designed for exposure to weather.
However, do not direct concentrated pressure into charging-port seals, cameras, sensors, damaged underbody panels or exposed electrical components. Close the charging door and follow the owner’s manual.
Common Car-Washing Misconceptions
“Dish soap cleans better.”
It may cut grease, but it is not designed as routine paint shampoo and can remove protective products. Strong cleaning is not the same as safe cleaning.
“A foam cannon prevents all scratches.”
Foam can loosen dirt and improve lubrication, but scratches can still occur during contact washing and drying. Tool cleanliness remains essential.
“Automatic car washes always damage paint.”
Wash design and maintenance vary. A well-maintained touchless wash avoids brush contact but may not remove all film. Brush systems can clean more aggressively but introduce a higher risk of contact-related marking.
“Rain washes a car.”
Rain may rinse loose dust, but it does not remove brake dust, traffic film, salt or bonded contamination. Rain can also leave mineral or environmental deposits behind.
“Wax repairs scratches.”
Wax may temporarily reduce the visibility of very light imperfections, but it does not remove scratches. Paint correction involves controlled polishing and should be separated from routine washing.
“More pressure means a cleaner car.”
Excessive pressure can damage weak paint, trim, film edges and delicate components. Chemistry, dwell time, lubrication and safe agitation are usually more important.
Pros and Cons of Washing a Car at Home
Advantages
- You control the products and tools.
- You can identify paint damage while washing.
- Reusable supplies reduce the cost per wash.
- Delicate areas can receive individual attention.
- You can avoid shared automatic-wash brushes.
Disadvantages
- It takes time and physical effort.
- Incorrect technique can cause scratches.
- Winter washing may be impractical.
- Water runoff may be restricted.
- Hard water can cause spotting.
- Buying specialist equipment can become expensive.
Home washing is not automatically safer than a commercial wash. It is safer only when the tools, products and technique are suitable.
How Often Should You Wash Your Car?
There is no universal schedule. Wash the vehicle when contamination presents a risk or becomes difficult to remove.
A practical guideline is:
- Normal driving: approximately every two to four weeks.
- Winter salt exposure: more frequently when conditions permit.
- After mud or off-road driving: as soon as practical.
- After bird droppings, sap or bugs: spot-clean promptly.
- Before long-term storage: wash and dry thoroughly.
- After coastal driving: rinse salt residue, including lower areas.
- Rarely driven garage vehicle: according to dust and contamination levels.
The condition of the vehicle matters more than the calendar. A garaged weekend car and a daily commuter on salted Ontario roads do not require the same schedule.
How to Keep a Car Clean Longer
- Remove bird droppings and sap promptly.
- Keep clean microfibre towels in the vehicle for emergencies.
- Avoid parking beneath sap-producing trees.
- Apply an appropriate wax or sealant.
- Clean door jambs during regular washes.
- Wash towels without fabric softener.
- Store wash mitts where they cannot collect dust.
- Do not wipe dry dust from the paint.
- Clean floor mats before salt residue spreads through the interior.
- Address leaking fluids before they contaminate the undercarriage and driveway.
When should you pay for professional detailing?
Consider detailing when the paint feels rough after washing, stains remain, scratches require assessment, odours persist, winter contamination is extensive or the vehicle needs polishing rather than routine cleaning.
Conclusion
So, how do you wash a car correctly? Remove loose grit before touching the paint, keep wheel tools separate, use automotive shampoo, work from the top downward, rinse completely and dry the vehicle before water evaporates.
For Canadian drivers, the process should also account for road salt, freezing conditions, wheel-well buildup and undercarriage cleaning. The safest wash is not necessarily the one with the most products. It is the one that controls contamination, minimises friction, respects the vehicle’s finish and manages wastewater responsibly.
Frequently Asked Questions
How do you wash a car for the first time?
Start with a basic two-bucket setup, automotive shampoo, a microfibre mitt, separate wheel tools and a drying towel. Work on cool panels, pre-rinse thoroughly, use light pressure and wash from the top downward.
What is the correct order to wash a car?
Clean the wheels with separate tools, pre-rinse the body, treat heavy contamination, contact-wash from top to bottom, rinse thoroughly, rinse the undercarriage when needed, and dry immediately.
Should you wash the wheels or body first?
Washing the wheels first is practical because splashed wheel residue can be removed during the body wash. Keep all wheel equipment separate from paint equipment.
Can I use one bucket to wash a car?
You can, but a two-bucket method or multiple clean mitts lowers the chance of returning dirt to the paint. A single dirty bucket provides less contamination control.
Can I wash my car with only water?
Water can remove loose dust and salt, but it may not safely remove bonded traffic film. Automotive shampoo adds cleaning ability and lubrication.
Is a sponge safe for car paint?
Some soft automotive sponges can be used safely, but a quality microfibre or wool wash mitt generally holds contamination away from the paint more effectively. Never use an abrasive household sponge.
Why does my car still look dirty after washing?
Common causes include insufficient prewashing, weak agitation, dried shampoo, traffic film, contaminated towels, hard-water spots or missed lower panels.
Why do swirl marks appear after a car wash?
They usually result from dragging dirt across the surface with contaminated wash media, brushes or towels. Dry wiping and aggressive circular scrubbing can make the marks more visible.
How do you wash a black car without leaving marks?
Wash on cool panels, pre-rinse thoroughly, use several clean mitts, apply light pressure, rinse completely and dry with clean microfibre towels. Dark paint makes minor defects and mineral deposits easier to see.
How do you dry a car without water spots?
Dry it immediately after rinsing, work from top to bottom, use an absorbent microfibre towel and remove trapped water from mirrors and trim. Filtered rinse water or a drying aid may help in hard-water areas.
Can you wash a car in freezing weather?
Use an indoor or heated facility rather than allowing water to freeze outdoors. Dry seals and openings carefully before exposing the vehicle to severe cold.
Is a touchless wash safe for ceramic coating?
It avoids rotating-brush contact, but the chemicals used vary. Check the coating manufacturer’s maintenance recommendations and avoid unnecessary high-alkaline options where possible.
Should you wax a car after every wash?
No. Apply protection according to the product’s durability and the condition of the paint. Spray protection may be used more often than traditional wax, but overapplication is unnecessary.